
This group of characters became known as the "free radicals" for a commercial spot I worked on. A single radical is a stylized and amplified version of the idea of the free radicals that float inside your body and can make you sick. It grew into a fun and versatile character that could branch off into new ideas and creations.

MODELING
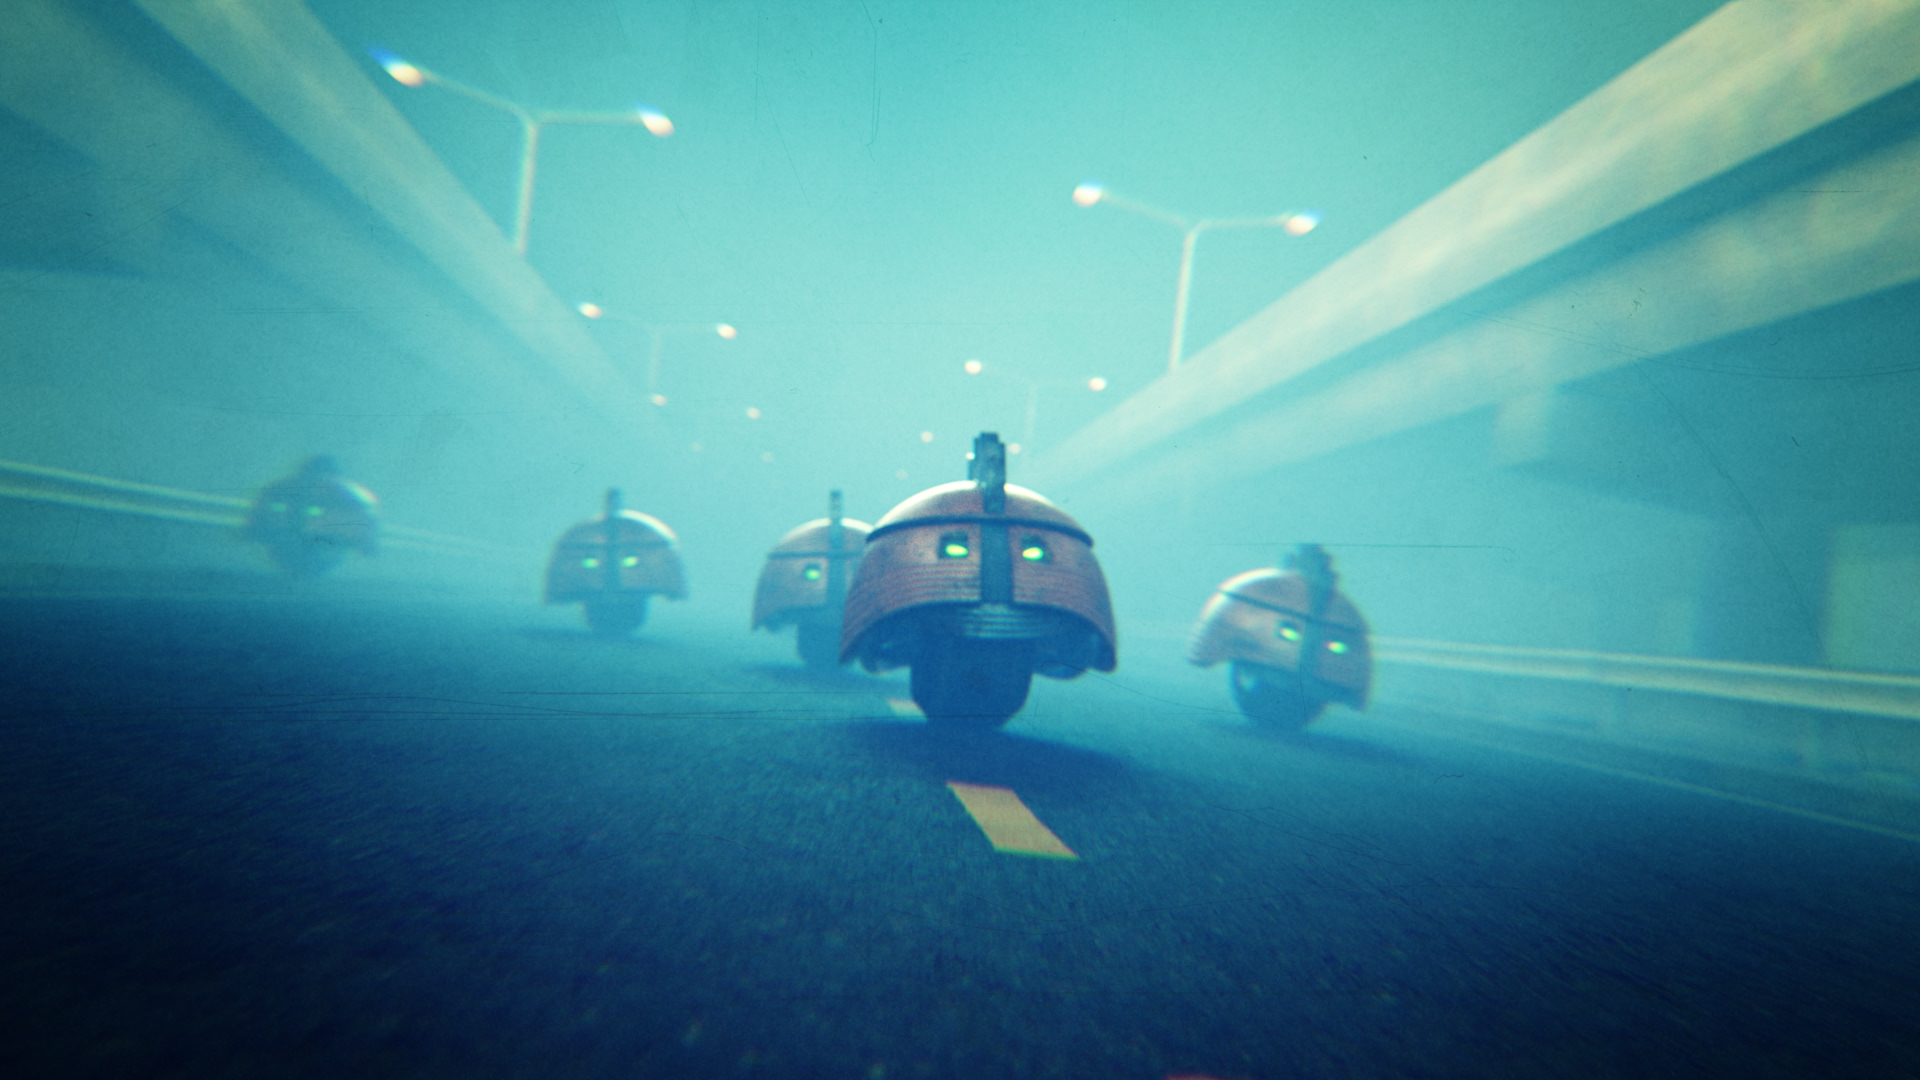
This was the sketch from my creative director that we used as a base. Overall I took the shape but made it a feel a little edgier with the metal mohawk (it is "radical" after all) and then I felt like the wheel wells needed to cover the tire more, it felt a little too exposed. underneath I made sure to add the double exhaust, it was a good piece that allowed for some scratched chrome and the potential to shoot flames or smoke out. My inspiration was sort of Mad Max meets 300, and I felt like it could have been perhaps an enemy in Teenage Mutant Ninja Turtles from my childhood.
I modeled everything from scratch, primarily using subdivision techniques. I started with symmetry for the main helmet, then split that middle with the mohawk. I added a face plate and grill to create more separation and layers to make adding different materials easier and the model overall more interesting. I added the grooves in the outer shell just for some more detail to maybe catch some ambient occlusion. The exhaust pipes were sweeps that I angled so they would definitely be visible, I wanted them to be seen.
As the feature has become stronger in Cinema 4D, I tend to use more Volume Modeling for parts that would be very complicated using subdivision techniques. Specifically here I did the tire tread, since it was easier to do via a MoGraph cloner as a repeating pattern. It ends up looking better as actual geometry rather than displacement level detail at the material level, and you couldn't tell it wasn't seamless with the tire, so that saved a ton of headaches instead of trying to do that detail as one piece. I also used volume modeling for a minor detail along the top, the sort of crown has a weld ring around it that was uneven, since it was protruding I made it a separate piece.
The actual project for the client didn't really offer a showcase of the model, it ended up being much less than we expected. So I made an extra animation in an edgier style I felt fit the character, and to showcase it as a 3D animation to see the whole model and all the textures.
ANIMATION
Part of the animation process I always like is rigging up control panels, whether in After Effects of Cinema 4D. I like having all the relevant options in one spot, and relabeling it so that it makes more sense from a qualitative perspective. Instead of rotating parts of the geometry I bundle them together to create movement ideas like tilt, banking, head turns. etc. There's some handy rigging to make it so that it can automatically follow spline paths and have tires rotate correctly without keyframing. It's a collection of controls to make the body move more like a motorcycle, plus some quick offset for the blinking, textures, and idling just so it can vary from bot to bot with the click of a button to avoid uniformity. I did it all with XPresso, mostly just Range Mappers translating one property to another.
I used the motion camera in Cinema 4D to follow an invisible radical and orbit around it, allowing the main hero radical to have a little more variation in its proximity to and from the camera. There's some camera shake so it feels a little edgier as well. Mainly I just wanted a camera shot that captures the whole model from basically every angle.
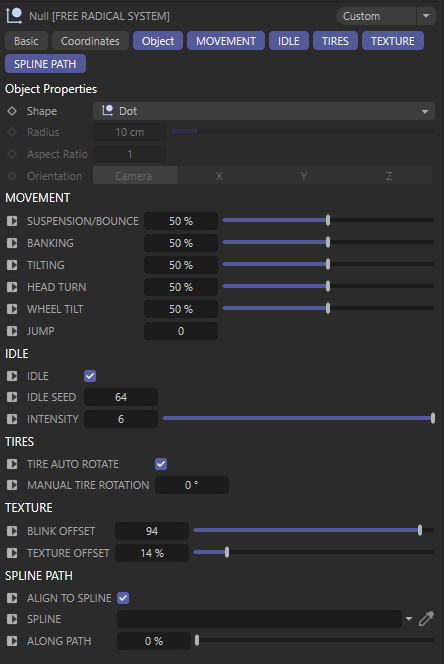
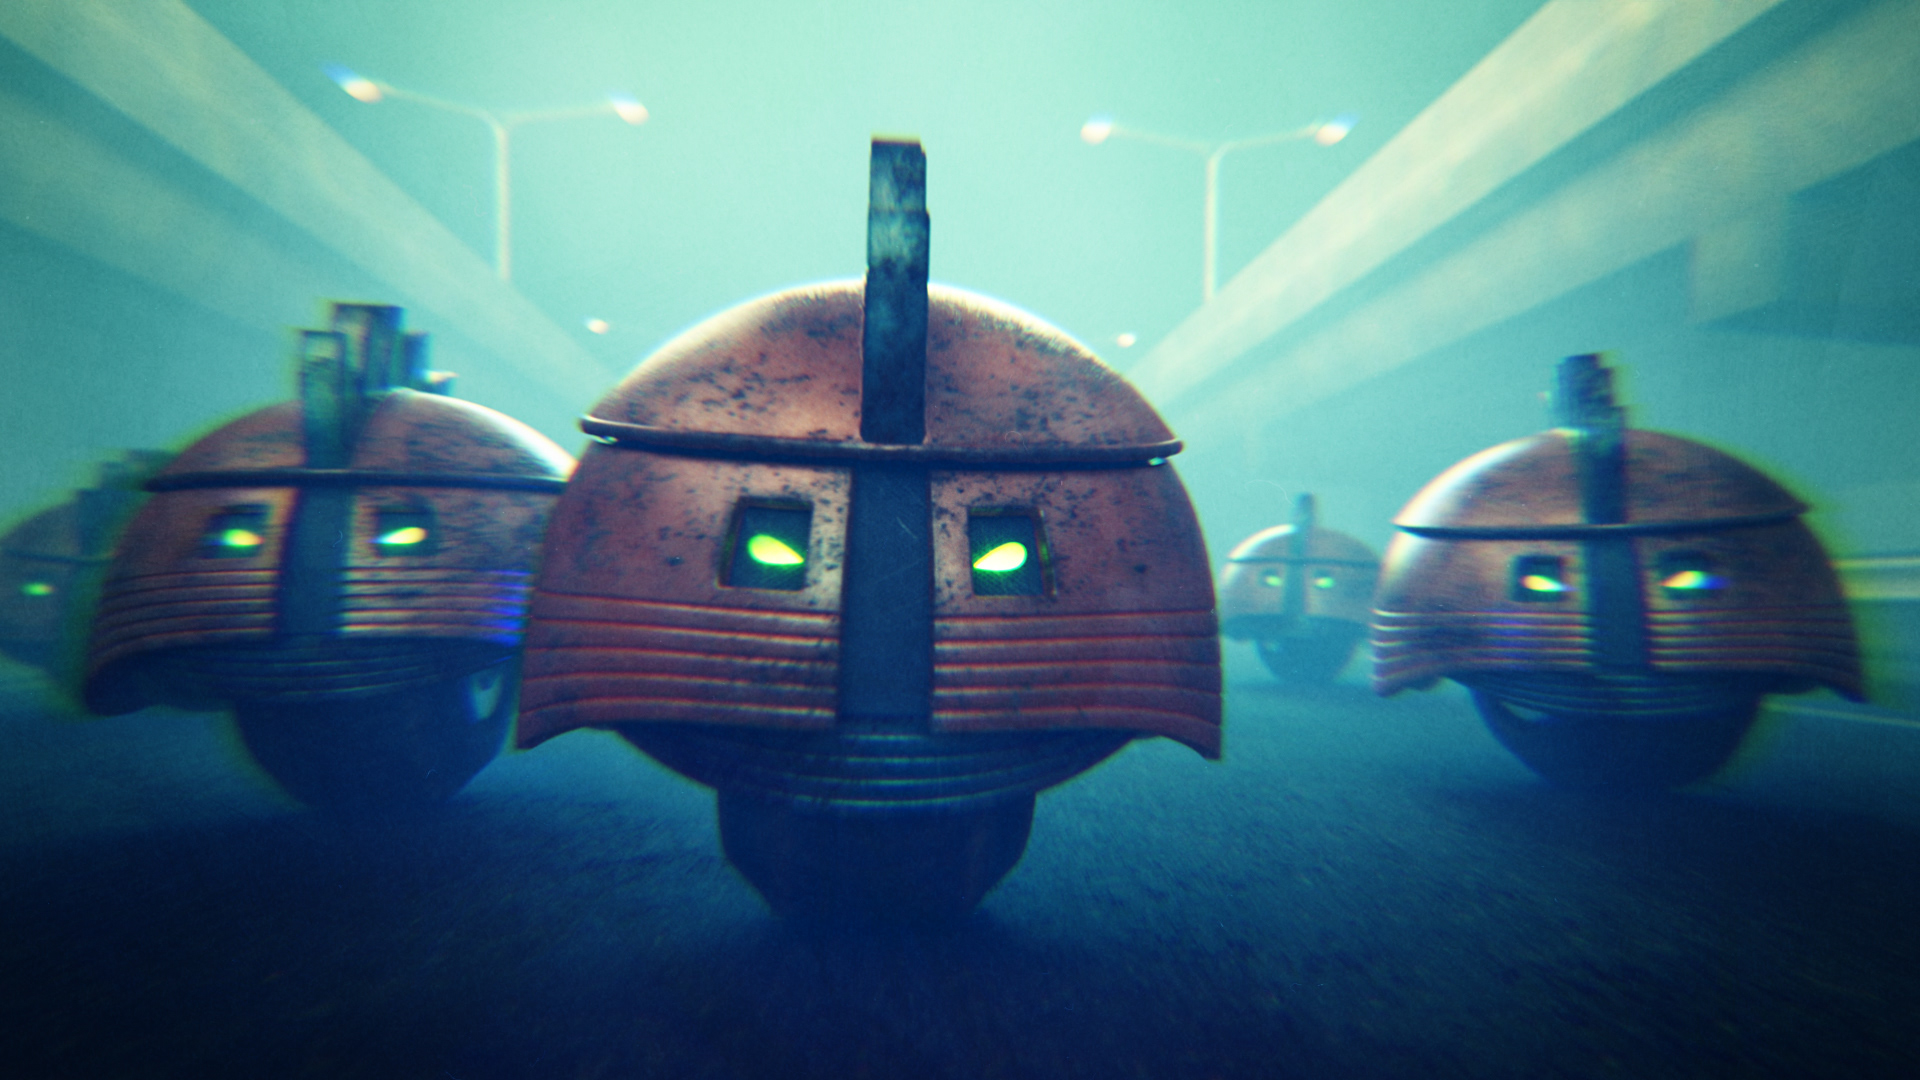
I kept adding radicals until it felt good, there's a infinite amount of combinations and paths they could take, I mostly just focused on making it feel like they were in a race or like behaving like a gang. I wanted them to glance at each other, weave in and around, draft behind, and make a pass at different times. They should move independently but feel like a group.
COMPOSITING/FX
In compositing I just wanted to grunge it up and make it feel less like CG and more stylized. The grunge overlays are some of the same used in the textures on the bots to add a connection. I pushed the LUT and the atmosphere to feel like a foggy, industrial night in Redshift with some tweaking in After Effects. There's some chromatic aberration going on and motion blur away from the center to help bring the center hero bot into better focus.

I made the blue flame as a VBD in XParticles and just pinned it to the exhaust inside Cinema 4D. It's supposed to be the reveal of the animation, you don't see it at first and then it flip halfway through to reveal it. From the back I pumped up the composite to make it feel like it was provided a healthy amount of illumination.
ORIGINAL SPOT
I built, animated and composited the radicals in the shots. You can maybe see why I felt the need to do more with them since they really weren't featured in the spot in the end, they needed a bit more of a close up. Overall the object was the same, make them move individually but sort of have the same intention and purpose in mind, moving as a group on entry and a little more chaotic and scattered on exit.
I actually found a clever way to do sort of like a clone army while giving them unique movement. I set up their individual parts as the exact same cloners in Mograph, so the tires could move different than the body but seemingly remain connected in the same place. Another cloner was made for the eyes to blink at different intervals. There's a few different instances of the metal material on there so it's not the same repeating texture on each clone. This saved system resources and allowed you to increase their numbers quickly rather than one by one.
Overall it is a fun character, there's a lot of potential having a little unicycle bot army, maybe I will revive it someday and build some other shots.